As our patients get older, restorative dental treatment demands even more attention be given to balancing functional enhancement with overall oral health. Moreover, comprehensive restorative rehabilitation often necessitates a combination of different restorative treatments (e.g., veneers, crowns, and implants) to restore this balance of both function and durability. Successful outcomes require meticulous planning, precise execution, and effective communication with the dental lab. In the following case, I outline the process of restoring a patient’s smile involving veneers, crowns, and an implant-supported bridge, employing digital scanning technology and a patient-centric approach.
Patient presentation
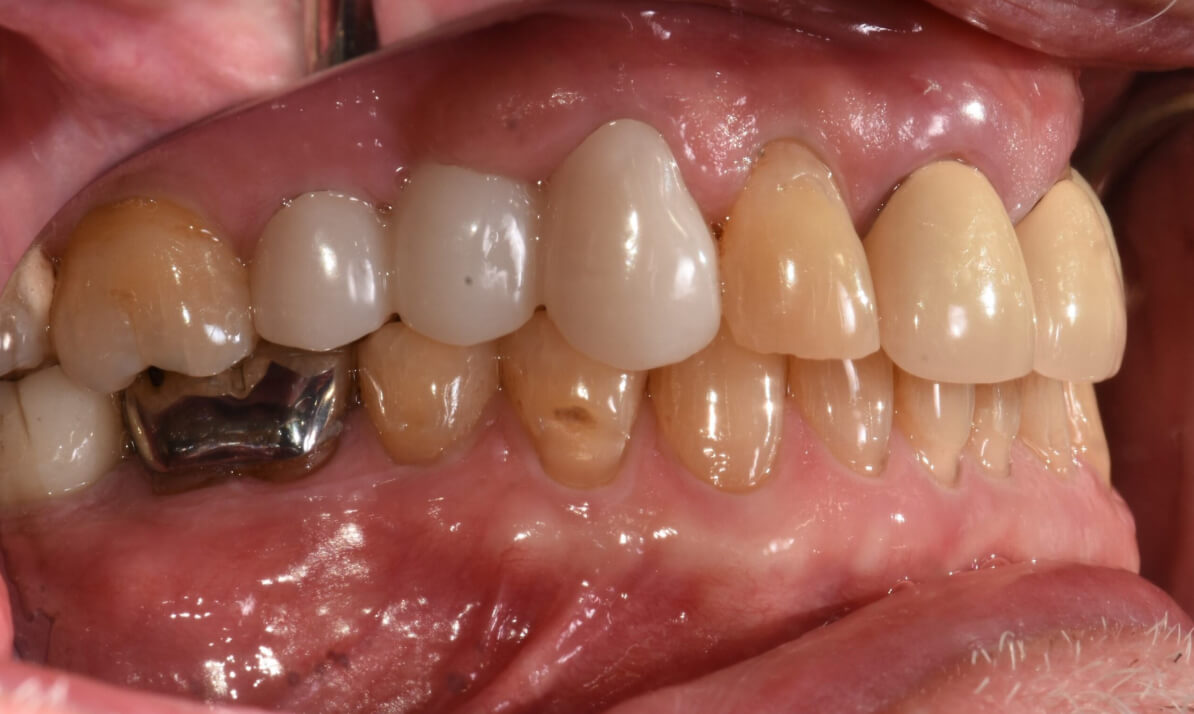
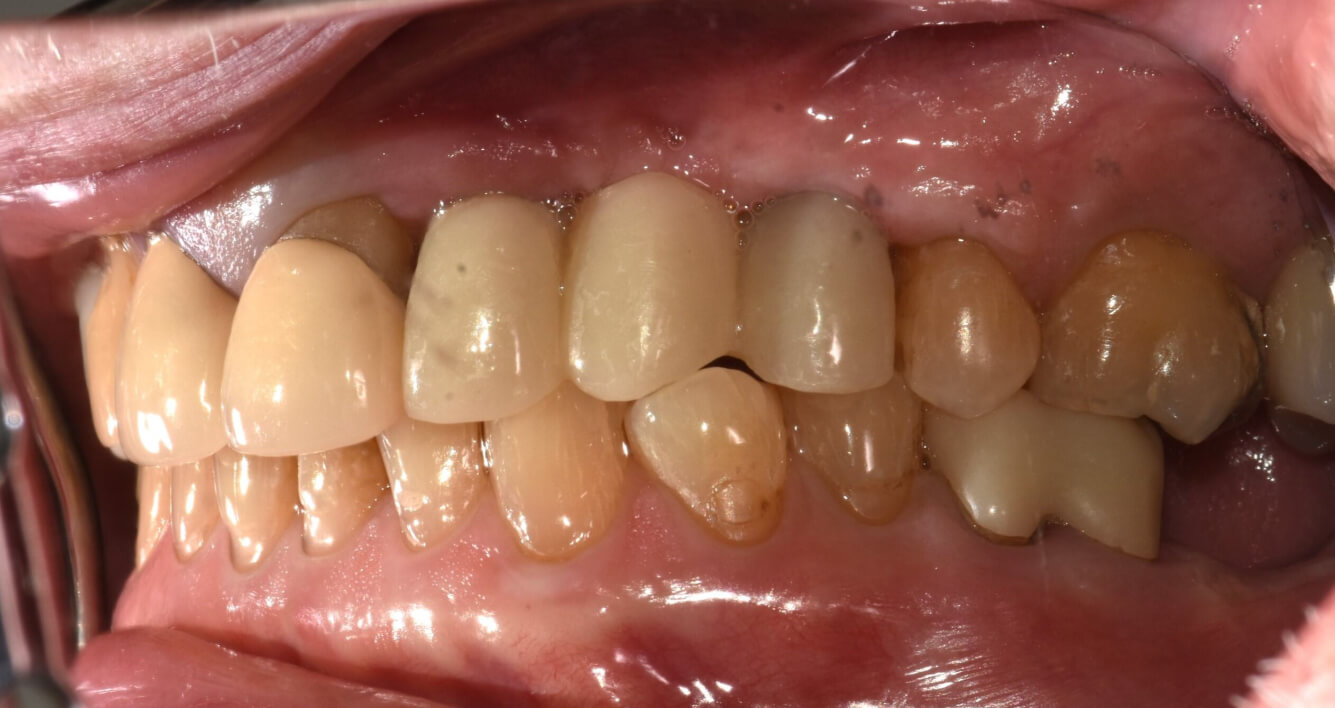
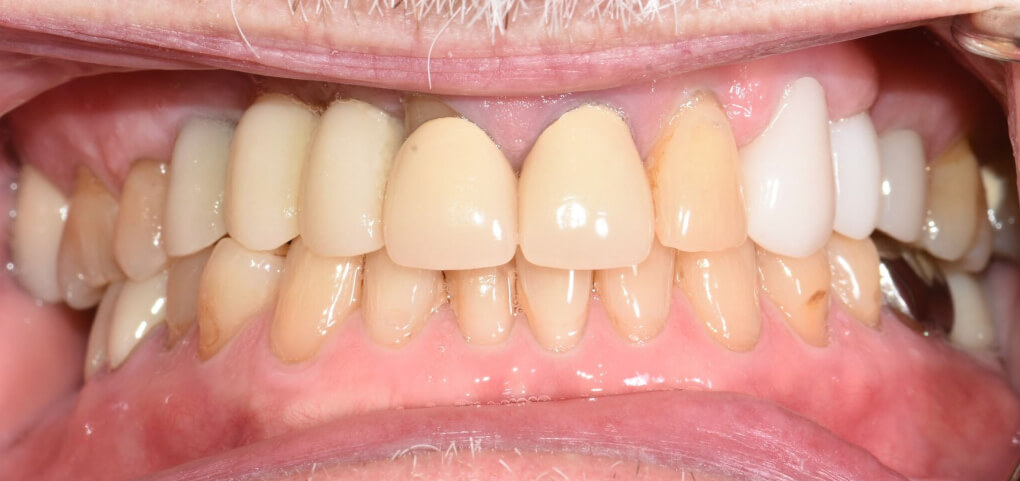
Figures 1a, 1b, 1c: The patient’s dentition upon visual inspection reveals previously existing restorations to be replaced.
In the case discussed here, an 81-year-old patient presented to my practice with a desire to improve both the functionality and appearance of his dentition. The treatment plan included veneers on #4 and #10, crowns on #8 and #9, and an implant-supported bridge replacing the edentulous area from #5-7. The patient selected shade B1 to match their desired outcome.
Case description
Appointment #1: Preparations, Scanning, and Temporization
The first phase of treatment involved preparations for veneers on teeth #4 and #10, crowns on teeth #8 and #9, and an implant-supported bridge. Local anesthesia was administered using 4% Septocaine with 1:100K epinephrine via infiltration. The veneer preparation areas were isolated with a cotton roll and OptraGate, followed by the placement of triple-zero retraction cord for effective gingival management. Intraoral scans were captured, and the final veneer restorations were ordered in monolithic zirconia with a Vita B1 shade. Temporization was completed with Paradigm Bisacryl material secured using Neo-Temp cement.
Crown preparations were completed for teeth #8 and #9, using the same anesthetic protocol. After cleaning the preparation sites with pumice, triple-zero retraction cord was packed, and intraoral scans were captured. The prepared teeth were temporized using Paradigm Bisacryl material. Monolithic zirconia crowns with Vita shade B1 with light occlusal staining were ordered.
Figure 2: Intraoral photo showing prepared teeth with packed cord and exposed implant sites. Compare this photo to the intraoral scan (Figure 3) shown below.
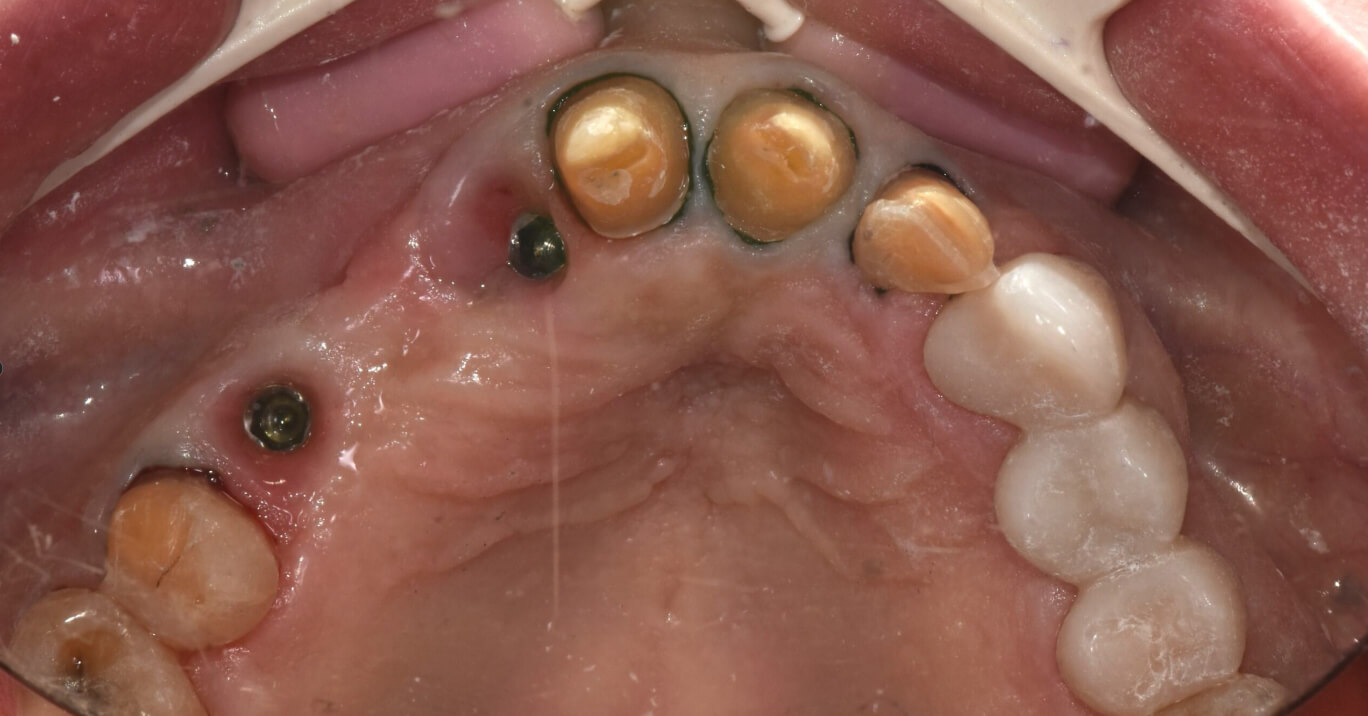
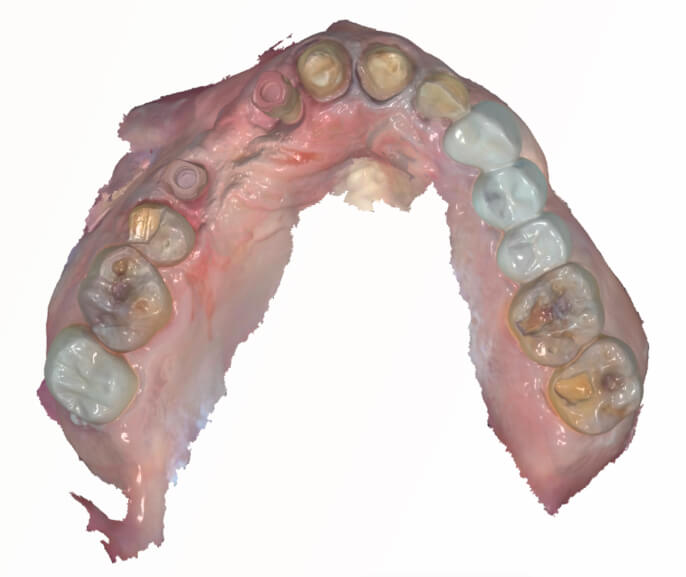
For the implant-supported bridge, the patient’s existing temporary bridge was carefully removed, and composite and Teflon tape were cleared from the access sites. Zimmer TSV 3.5 platform scan bodies were seated, and radiographs were captured to verify complete seating. Intraoral scans were then captured. Following the scans, the temporary bridge was re-cemented with Neo-Temp, and the final zirconia bridge with screw-retained abutments was ordered in Vita B1 shade. A Digital Design Preview was ordered to validate Dandy’s proposed designs prior to the subsequent delivery appointment for this patient.
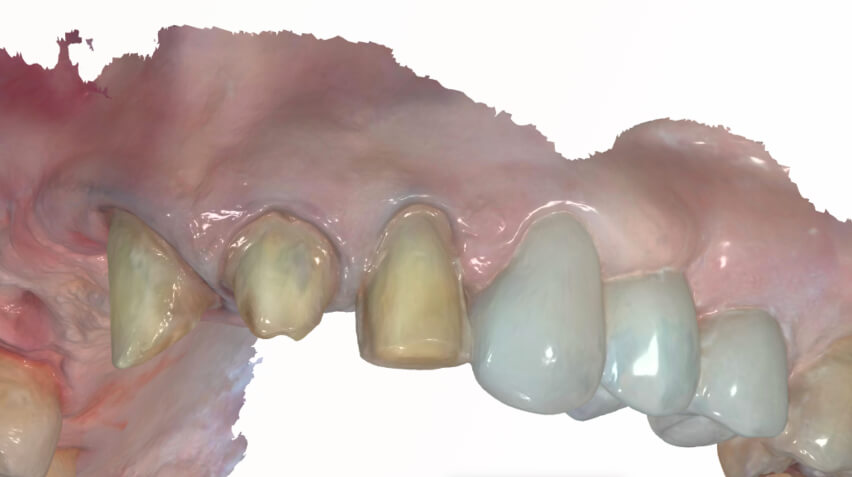
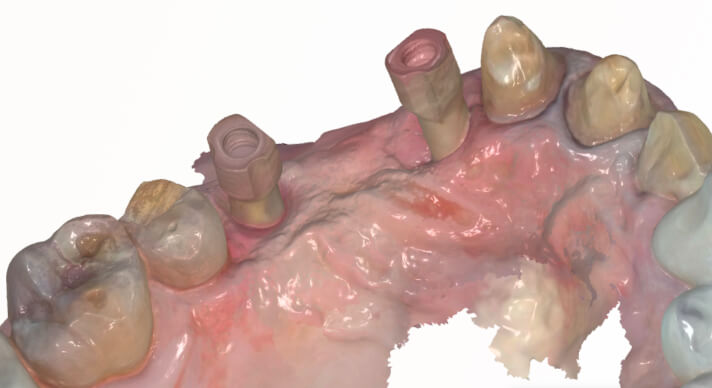
Figure 3a, 3b, 3c: Intraoral scans of the maxillary arch. Note the seated scan bodies at sites #5 and #7, and the prepared teeth (#4, #8, #9, and #10). Compare this scan to the intraoral photo in Figure 2 above.
Appointment #2: Delivery
Approximately four weeks later, the delivery appointment was completed. Prior to this appointment, designs were reviewed and ultimately approved via the Digital Design Preview requested in the previous appointment.
The temporaries on teeth #4 and #10 were removed, and the preparation sites were cleaned thoroughly with pumice. Veneers were cemented to the respective teeth. Veneer #4 required re-cementation during delivery, and it was bonded with a combination of adhesive and flowable composite to ensure durability. The patient was advised about potential risks for this restoration, including the possibility of requiring a crown if failure recurred.
Next, the temporaries on teeth #8 and #9 were removed. The crowns for these teeth were seated and evaluated, and slight adjustments to interproximal contacts and occlusion were made. Once the ideal fit and occlusion were confirmed, the crowns were cemented using RelyX Universal Cement.
Lastly, the temporary implant-bridge spanning teeth #5-7 was removed. The final zirconia implant-bridge was seated with the abutments torqued to the appropriate specifications. Access sites were sealed, and occlusion was verified to ensure patient comfort and functionality.
The patient achieved a highly satisfactory functional result with restorations in Vita B1 shade. The integration of veneers, crowns, and the implant-supported bridge created a cohesive, restored smile. The patient was educated on the proper care and maintenance of his restorations, including the significance of an occlusal guard to ensure the longevity of this treatment.
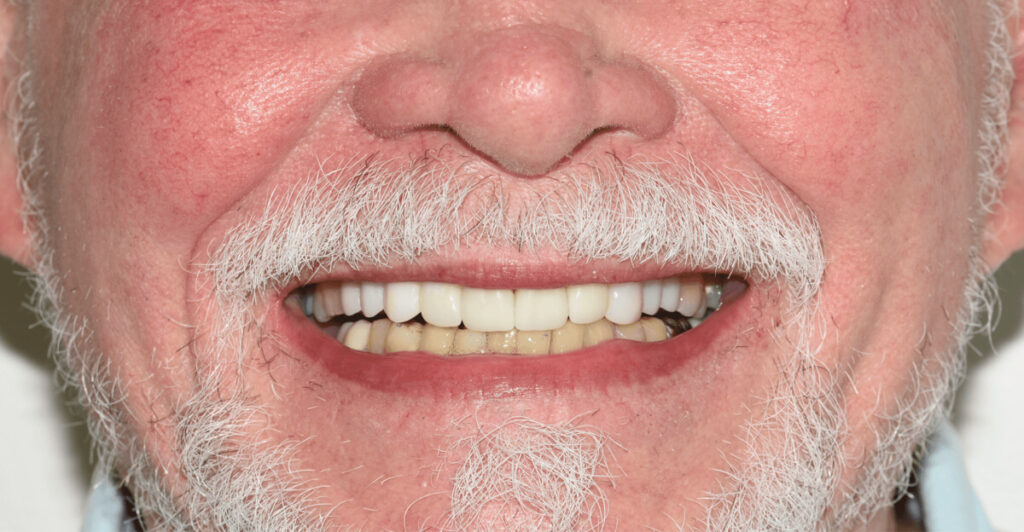
Figure 4: The delivered veneers, crowns, and implant-bridge.
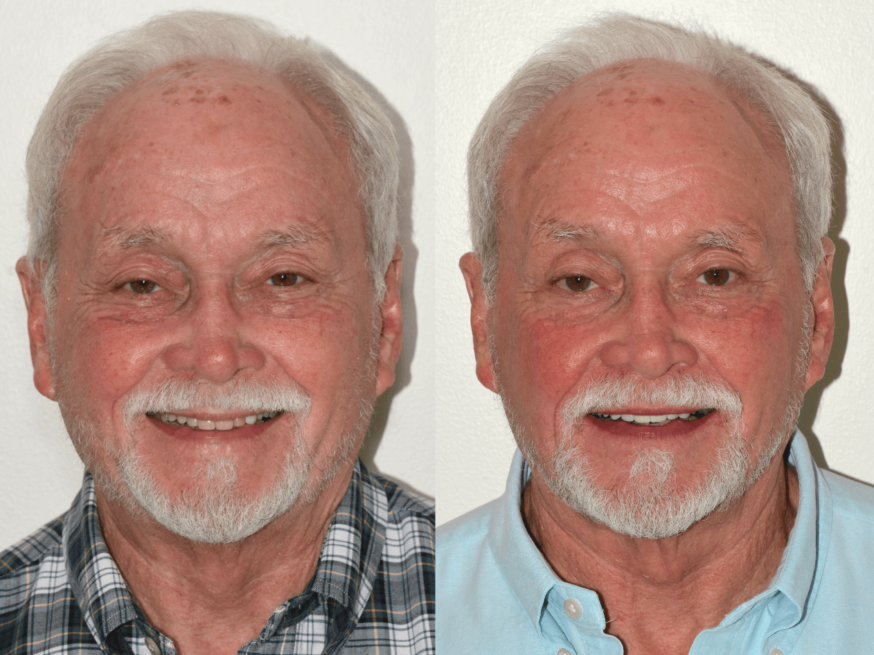
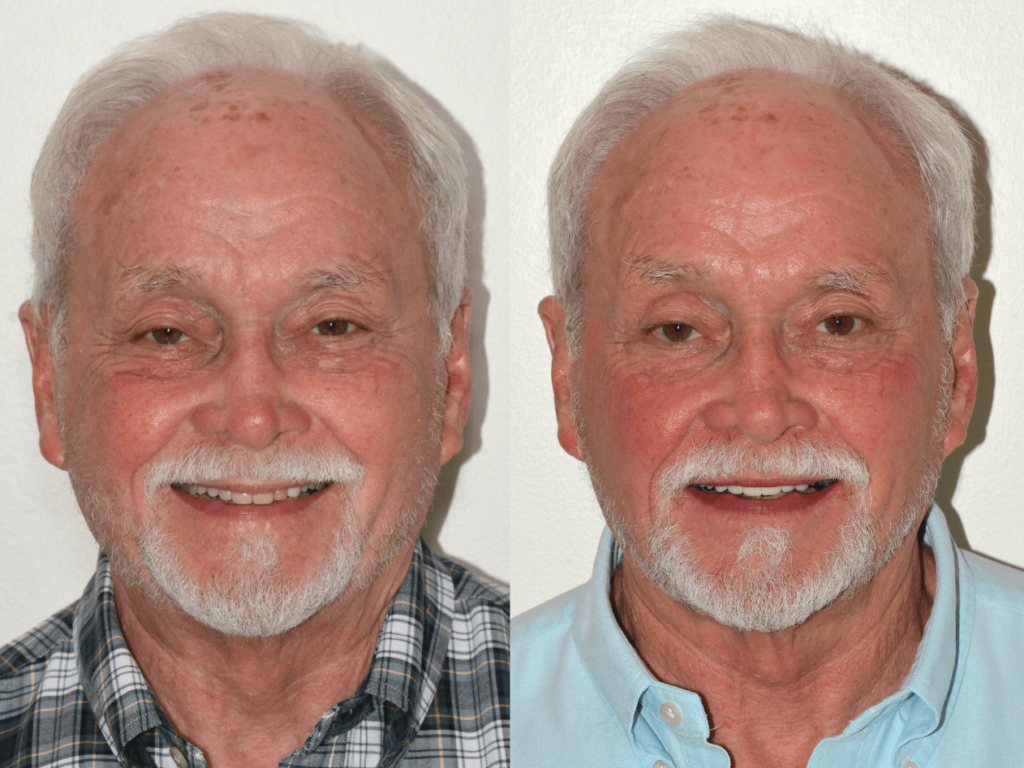
Patient before and after
Dandy’s technology
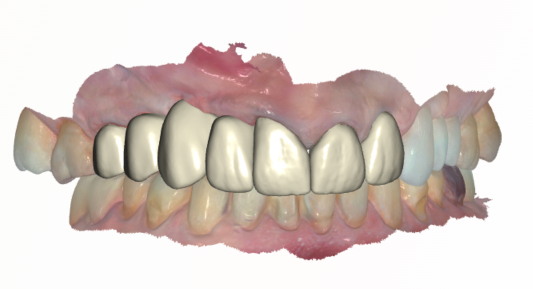
The use of Dandy’s Digital Design Preview was essential for this complex restorative case. The design preview provided the opportunity to review and approve the design with confidence before it proceeded to fabrication. This tool not only ensures accuracy but also creates a more predictable and seamless delivery appointment.
Figure 5: The Digital Design Preview previewing the proposed design of all of the final restorations. This design preview was reviewed and approved prior to the final restorations being fabricated. If edits were needed, I could have requested an update to the design with additional feedback.
Conclusion & Best Practices
This case highlights the importance of a well-coordinated digital workflow in managing complex restorative treatments. Using intraoral scanning technology and a design preview, we were able to achieve the results we wanted. Effective gingival management (especially while scanning), temporization, and patient education were essential to this success. Proactive planning, including the recommendation of an occlusal guard, further supported the long-term functionality of the restorations. In the end, a case such as this requires extreme attention to detail and precision each step of the way between both practitioner and dental lab, and partnering with Dandy and using their technology resulted in a successful patient outcome.
About the author
Dr. David Donelson is from Atlanta and has a license to practice in Tennessee, Florida, New York, and Dubai. Dr. Donelson received his Doctor of Medicine in Dentistry (DMD) in 2009 from Tufts University School of Dental Medicine in Boston. He then moved to Jacksonville to attend a post-graduate certificate program in general dentistry at the University of Florida College of Dentistry.
Dr. Donelson is a current or past member of many academies, including the Academy of Implant Dentistry, the American Dental Association, the Academy of General Dentistry, and the American Academy of Cosmetic Dentistry.
