Precise impression-making is essential for creating well-fitting dentures and restorations. Here we cover digital vs. conventional bite registration workflow for fabricating full-arch dentures.
What is bite registration?
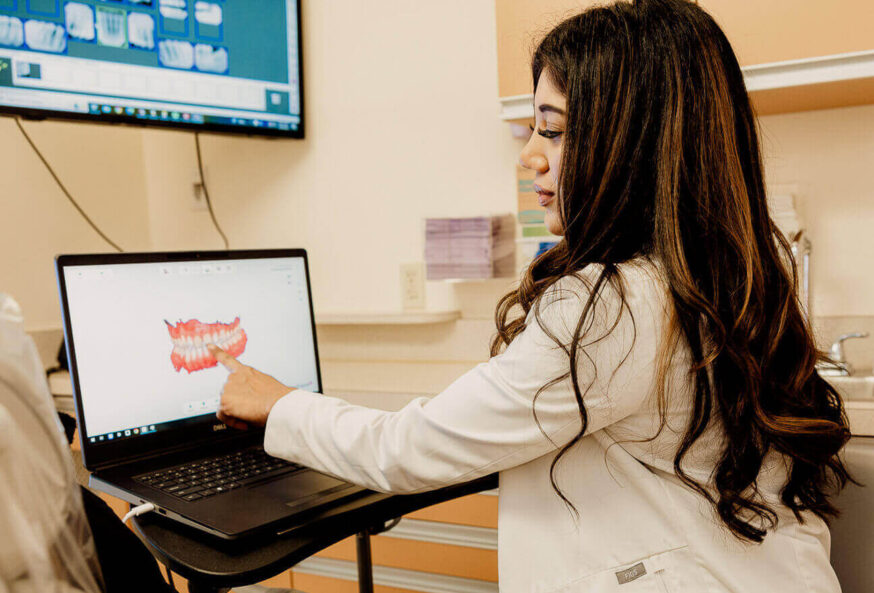
Bite registration is a type of impression that reveals how the patient’s upper and lower teeth fit together (occlusion). Bite registration impressions are created digitally with an intraoral scanner or conventionally with impression materials.
A study revealed that the digital bite workflow was 60% faster than conventional techniques.
What is bite registration when creating dentures?
Bite registration dental impressions are taken to assess how a patient’s upper and lower teeth are positioned and how they fit together. The impressions are also used to fabricate products like crowns and mouth guards.
What materials are used for bite registration?
Wax bite rims and dental bite registration materials are used for bite registration.
Bite registration material brands include Blu-Bite HP (Henry Schein), Elements (Pac-Dent), Genie (Sultan Healthcare) and Blu-Mousse (Parkell).
How do wax bite rims help with bite registration?
Wax bite rims help the dentist record the patient’s biting position, take accurate measurements, and record the correct lip support so the dentures will fit comfortably.
How does Blu-Mousse bite registration material help with bite registration?
Parkell’s Blu-Mousse VPS bite registration material is used to help “lock in the bite” and keep the bite at the proper vertical dimension for an ideal bite scan. The Blue Mousse can also be used to fill in gaps on worn down dentures. The material stays stacked on surfaces during placement. Blu-Mousse hardens to a plaster-like finish and resists breakage during trimming, positioning, and mouth removal.
Dental materials in a digital denture workflow
With Dandy, if there is existing dentition (enough for a bite), or an good existing denture or partial, there is no need for a wax rim.
If you are attempting to raise the occlusal plane from an old denture you can add material and then scan. That was we can ensure that the bite is in perfect occlusion no matter how worn down a denture may be. Materials can be Blu-Mousse (although it may be too runny and not offer any resistance to being closed all the way through) or the thicker bite wax or bite putty.
Capturing the dental bite registration digitally
Taking a precise bite scan is crucial to creating a successful full-arch denture. Below is an overview of the digital scanning workflow for patients with or without dentition on Dandy’s digital system.
For patients with dentition
Insert the wand tip. Ask the patient to close their mouth while using the wand as a cheek retractor.
Start the scanner. Begin scanning by holding the wand in the second molar area and slowly moving the scanner with a brushing motion until you reach the midline.
Turn off the scanner.
Choose “Bite 2” in the software and repeat the scanning process on the opposite side. The software will register the bite.
For patients with no dentition (edentulous) but have appliance
Lock appliances together with bite registration material if necessary.
Perform the bite scan extraorally, using a sweeping motion. Scan from the second molar to the second molar. Carefully follow the arches to capture the entire bite in one scan.
Wax bite rim workflow (patients with no dentition or appliance)
Appointment 1: Take intraoral scan
- Select the arch(es) that need a full denture to be fabricated.
- If facing difficulty scanning (in particular an edentulous lower arch) doctors may take a standard impression and scan either the impression or the model.
Appointment 2: Register bite via wax bite rim and take 360 extraoral scan of wax rim
- After receiving the wax bite rim from Dandy, guide the wax bite rim into the patient’s mouth to get an accurate bite impression.
- Apply light body wash to the wax bite rim for border molding and accuracy.
- Clearly mark the wax bite rim with the patient’s smile lines, canine lines, and midlines.
- Add material to register bite.
- Highly recommended: Take photos of the patient.
- Head-on photo with the patient smiling naturally (with wax bite rim in place).
- Two profile pictures (one from each side) with the patient smiling naturally (with wax bite rim in place).
- If possible: A head-on photo of the patient with cheek retractors in place (with wax bite rim in place).
Set up the case and scan the denture
- Perform 360 extraoral scan of the wax bite rim(s).
- To obtain bite registration:
- If single arch wax bite rim, scan with wax bite rim in mouth (from molar to midline) with blue mousse.
- If dual arch wax bite rim(s), scan both arches in occlusion outside of mouth (full arch from molar to molar) with material.
Conventional bite registration workflow vs digital workflow in dentures
Conventional dentures usually require multiple patient visits, an extended adjustment time, and days lost in shipping. Plus, each touchpoint can lead to production errors including material shrinkage. That’s why more dentists are modernizing their practices to include digital dentistry.
An overview of the conventional denture design process
Preliminary impressions are made for an initial fit. The patient’s vertical dimension of occlusion (VDO) is measured with a wax tray. Wax enhancements may be required.
Definitive impressions are made for aesthetics and fit. During this stage, bite, tooth layout, and gingival contours are revealed.
A customized denture tray is used to make master impressions which are sent to a lab to fabricate the final model.
Once the impression is delivered to the lab, the techs work on a model from the physical piece.
They send the denture back to the dentist who schedules time for the patient to come in.
The patient tries on the dentures and sees how comfortable the bites feels, this may take a few attempts and back-and-forths with the lab.
After adjustments, the final dentures are inserted into the patient’s mouth.
More adjustments may need to be made depending on the patient.
Digital dentures in 2 appointments with Dandy
Appointment 1: The scan. An intraoral scan is taken of the patient’s upper and lower arches and bite registration through a dentition or appliance. A precise digital model is immediately exported as a digital file to Dandy’s dental laboratory. An expert digital denture design team will review the digital files to ensure that the 3D-printed dentures will fit perfectly.
Appointment 2: The fitting. In approximately a week, the completed denture model will arrive at the office. Note: There may be minor adjustments for a few patients. Your patients will have their new dentures in two or three appointments.
Digital dentures for edentulous patients
Appointment 1: The dentist scans the upper and lower edentulous arches. The scan is uploaded and then sent to the lab. A wax rim is created and shipped to the dentist.
Appointment 2: The dentist registers the bite using the wax rim and performs a 360° scan. The resulting scan is digitally merged with the intraoral scan to create a complete model.
Appointment 3: When fabrication and printing are complete, the model is inserted into the mouth for a perfect fit.
The benefits of digital denture design
- Time savings
- Fewer appointments required
- Improved turnaround time
- Greater accuracy
- Quick replacements
- Cost-effective
Simple bite registration and digital dentures with Dandy
Full dentures is a complex process, regardless of if you’re using the traditional or digital denture workflow, and an important step in either process is bite registration. Whether you’re new to digital dentistry or you’re ready to start offering 2-Appointment dentures to your patients, Dandy is here to be your lab partner in digital dentures. From our expert clinical support staff to intuitive digital workflows, you can level up your practice with this new offer. Learn more today.


