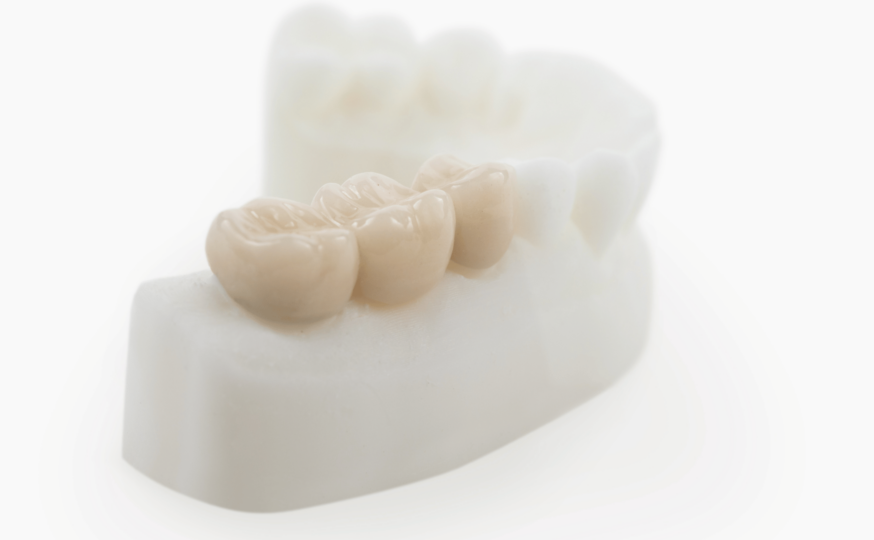
Porcelain-fused-to-metal or PFM crowns remain a popular restoration even with digital dentistry. In order to do PFM crown prep successfully, you need to keep several things in mind throughout the process.
The steps for all dental crown preparation materials should essentially be the same, says Jeannie Hughes, a Dandy digital dental expert with 30 years of experience.
To ensure we are starting on the same page, what do we mean by crown prep? The dental crown preparation or “crown prep” is the removal/reduction and shaping of the existing tooth structure in order to make adequate room for the tooth to receive a dental crown. This is performed by the dentist with a dental handpiece. An accurate crown preparation and scan are essential to the success of the final restoration (crown).
PFM crowns are popular amongst dentists mainly because they’re sturdy and reliable. One study found that the five-year survival rate of PFM tooth-supported prostheses was 99.5 percent.
Keep in mind that there are more aesthetic materials available, says Hughes. In the 1970s and 1980s, PFM was often the best aesthetic option but there are now more aesthetic and often stronger options such as, but not limited to:
- EMAX (brand name) Lithium disilicate (material)
- Zirconia
- PFZ: Porcelain fused to zirconia
Steps of PFM crown preparation
Here are the PFM crown preparation steps within Dandy’s digital workflow, as outlined by Hughes:
First take the preliminary impression for the provisional crown (if indicated, it is in most cases), then:
1. Begin preparation (reducing and shaping with a handpiece). The margins have to be obvious, a diamond dental bur is recommended for prepping the margin.
2. Manage soft tissue (retraction, ideally pack cord)
3. Prepare the area for scanning
Make it clean and dry: Be sure to thoroughly clean and dry all areas that will be scanned, the preparation, margin, opposing, adjacent contacts, and surrounding tissues should be free of saliva, blood, or debris. Ensure the tissue is not bleeding or control the bleeding before scanning.
Errors above can contribute to inaccurate scans which will lead to a crown having to be remade or refabricated.
Double-check at this time:
- Margin prep
- Path of insertion
- Reduction
- Occlusion
4. Scan the areas: If you partner with Dandy, employ Dandy’s Chairside Software as a guide
Keep in mind these digital scanning best practices:
- Keep gloves, tongue, cheek, and lips out of the scan area.
- Capture full arch scans.
- If the shutter noise stops, (it means scanner is “lost”) return to a nearby occlusal surface.
- Reduce moisture by using suction or compressed air before and during scanning.
- Use the Twist Technique for interproximals and hard-to-reach areas
- Ensure that scan in stone model mode
5. Evaluate the final scans of PFM crown prep, what to check:
A. Margin
- Is it clean and dry?
- Margins have to be obvious or easy to see
- No tissue, blood, cord, or debris should be obstructing your view
B. Interproximal contacts
- Mesial and distal contacts of the adjacent teeth must be accurately and fully scanned
- Mesial and distal contacts of the adjacent teeth are smooth, not jagged and/or uneven
C. Accurate bite
D. Guide the patient into centric occlusion and make sure it is accurate on both the left and the right sides.
E. Adequate reduction per material for the final restoration (crown)
F. Correct path of insertion
G. Shade capture—always include a shade—and photos (if indicated)
H. Verify the scans are accurate
6. Finish visit
- Submit the case to Dandy
- Seat the provisional crown
- Schedule patient for delivery based on date from the Dandy portal
PFM Crown prep dimensions
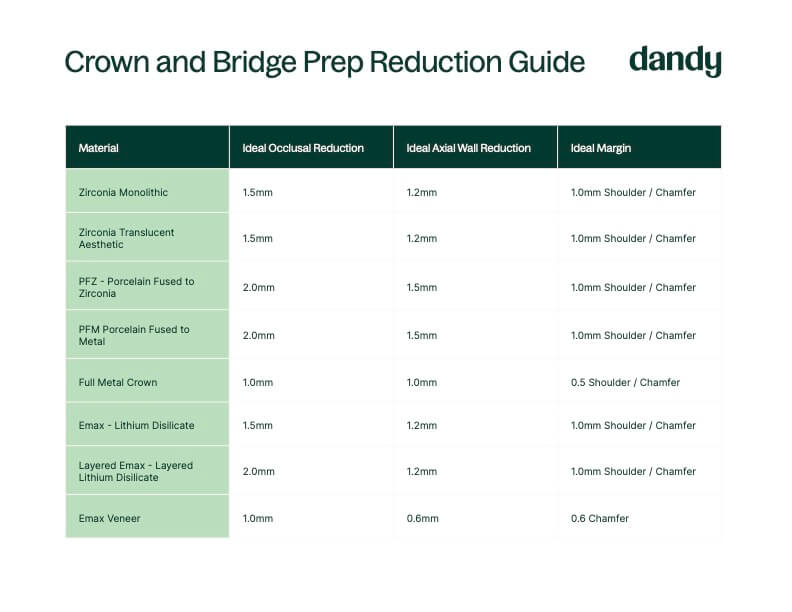
“It is very important to consider the material of the final restoration when reducing the tooth,” says Hughes. “Some materials, like PFM, require more reduction than a monolithic restoration.”
The tooth preparation needs to allow room for the porcelain, opaquer, metal, and cement gap.
“While Dandy’s dental experts understand that there is not always an ideal situation and minimal reduction is necessary, the [final restoration] doesn’t leave much room for proper anatomy or room for adjustments (if needed),” Hughes says.
(Please chat with Dandy’s clinical support or live scan review teams for assistance when choosing the best material for your case.)

Preparations of anterior crowns using PFM
It’s less common for dentists to use PFM crown prep techniques for anterior teeth. The most common reason? Aesthetics.
Preparation of posterior crowns using PFM
When completing PFM crown prep for posterior teeth, Hughes suggests you keep these factors in mind:
- Digital vs. analog:
- Using an intraoral scanner requires full margin visibility. Pro tip: Digital scans benefit most from shoulder or chamfer prep styles.
- If you’re following a partially digital or CAD-CAM fabrication workflow, much of the restoration is still fabricated by hand. Whereas monolithic restorations (made from zirconia or lithium disilicate) can often be fabricated using a fully digital or CAD-CAM fabrication workflow.
- PFM vs. monolithic restoration:
- Make sure to reduce enough considering the final restoration needs room for the metal, opaquer, and porcelain.
- Is it strong enough? Strength Zirconia vs. PFM
- Monolithic Zirconia is remarkably stronger than PFM
- Aesthetics: Is the crown on an aesthetic area or an area that might be noticeable? If so, there may be a better option because the metal base will be visible.
Limiting factors for PFM crown preparation suitability
There are a two main reasons a PFM crown might not be the number one choice for your patient:
Inadequate tooth reduction: Follow the guidelines above for each type of reduction method, ideal margins, and prep style.
Metal allergy: If the patient has a metal allergy, you’ll need to use zirconia or ceramic materials.
Best practices for PFM crown preparation with digital dentistry
If you’re new to these modern digital dentistry practices, try this Dandy-recommended guidance for crown preparation vs analog/traditional:
- Much of the PFM crown preparation is the same digitally as it is for traditional impressions. You need to reduce enough, have the proper taper, and path of insertion. Oftentimes, doctors don’t realize that you can’t get away with a feather edge or knife edge margin prep with digital as you sometimes could with traditional impressions.
- A feather edge or knife edge margin prep usually cannot be picked up by the scanner.
- Soft tissue management is non-negotiable with digital. Dandy recommends the double gingival cord retraction, aka packing cord.
- In order to capture an accurate scan the scanner must be able to pick up the entire margin 360 degrees circumferentially.
- The prep, adjacent contacts, and opposing should be dry and free of saliva, blood, and debris prior to scanning. The experts at Dandy like to say, “If you can see it, we can see it.”
Why do patients love this innovative process? Dandy’s experienced Live Scan Review experts check your scan before the patient leaves the chair, preventing patients from having to rebook another visit.
PFM crowns with Dandy
Dandy offers a seamless process of producing PFM crowns and more modern zirconia options through digital dentistry—explore the differences between the two types of crowns here. When you partner with Dandy we can help guide you through scanning, clinical support (including prep advice), and material selection. Contact us to learn more about Dandy’s digital lab workflow, turnaround times, and pricing.


