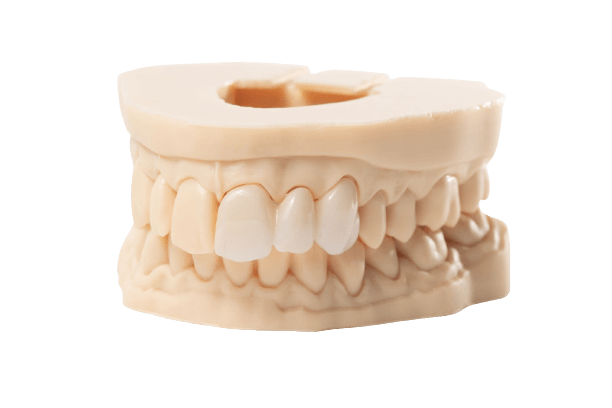
Greeting new patients at your dental practice starts with the basics: name, insurance, dental history—and an intimate look inside their mouth. But some assessments and treatments can’t be accomplished by oral spelunking alone. Having an accurate, 3D model of patients’ teeth, gums, and bite is essential, which is why most dental professionals rely on dental impressions.
In general, there are three conventional types of dental impressions you may take, each with its own purpose, preferred materials, and procedural standards. But with the emergence of digital impression technologies, the process of taking dental impressions in general has gotten a whole lot easier.
Whether you need to diagnose bite misalignments or fit a pro athlete for a mouth guard, impressions are elemental to the fields of cosmetic and restorative dentistry. And as more and more dental practices go hybrid, adopting new tech while retaining tried and true methods, digital impression tools promise to make dental impressions faster, simpler, and more accurate.
Dandy offers dental practices a free intraoral scanner.
A good vs bad impression
Materials science, logistical SNAFUs, human error–the very nature of traditional dental impressions makes them subject to flaw and imperfection. If the goal of taking a dental impression is a perfect 1:1 replica, fabricating properly-fitting restoration or appliance hinges on you delineating good and not-so-good dental impressions.
What makes a good impression versus a bad impression? Many of the below factor in both the traditional and the digital impression methods. For digital best practices please also read our Intraoral scanning technique article.
Accuracy
Good impression: Accurately captures the details of the oral cavity, including preparation margins, soft tissue, and occlusal surfaces.
Bad impression: Incomplete or distorted details can compromise the fit and function of the final restoration or appliance.
Prepared surface
Good Impression: Ensures that the teeth and tissue to be impressed were properly cleaned with water and preparation cleansing solution.
Bad impression: Does not adequately prepare surfaces leading to distortions and poor impression integrity.
Fit (traditional)
Good impression: Utilizes an appropriate tray size and type (stock or custom) that fits comfortably and covers all relevant teeth and tissue.
Bad impression: The wrong tray size or an ill-fitting tray can lead to incomplete or inaccurate impressions.
Distortions
Good impression: Shows the least possible distortion, minimizing air entrapment, ensuring that the final restoration or appliance accurately replicates the patient’s oral anatomy, including gumline and bite.
Bad impression: Distortions, such as tears, bubbles, or voids in the impression material, can result in inaccurate reproductions leading to adjustments or remakes.
Tissue management
Good impression: Effectively manages soft tissues, such as using retraction cords whenever necessary to expose preparation margins. For digital impressions we suggest the double cord technique.
Bad impression: Inadequate soft tissue management can obscure margin visibility leading to inaccuracies.
Material selection (traditional)
Good impression: Chooses the appropriate impression material (e.g., polyvinyl siloxane, polyether, alginate) based on the clinical situation.
Bad impression: The use of incorrect, outdated, or expired impression materials can result in inaccurate or unusable impressions.
Moisture control
Good impression: Ensures a dry field by managing saliva and moisture, which can distort impressions.
Bad impression: Moisture contamination can compromise the accuracy of the impression overall.
Tray release (traditional)
Good impression: The tray is removed gently and without unnecessary manipulation, giving a clean release with no distortion.
Bad impression: Forceful or highly-manipulated tray removal can create distortions and imperfections.
Inspection
Good Impression: The impression is carefully inspected for completeness and quality before sending it to the dental laboratory.
Bad impression: Failure to verify the quality of the impression can result in problems guaranteed to compound down the line.
What should be present in the impression?
Besides being free from obvious defects like voids, tears, bubbles, distortions, or malformations, proper dental impressions should:
- Capture the entire arch of the teeth
- Accurately reproduce the patient’s anatomy including the shape and size of each tooth including all cusps, pits, and fissures on tooth surfaces, but also gingival tissue and oral mucosa
- Clearly define any and all preparation margins
- Be properly labeled with the date and relevant patient data allowing tracing and clear communication with the dental lab
#1 Preliminary impressions
Preliminary impressions are typically taken during a patient’s first visit.
- Primary purpose – Preliminary impressions are used to gain a visual understanding of the patient’s teeth, document their dental health, and determine an appropriate dental treatment plan. They’re also the first step in the process of creating oral prosthetics, which may include:
- Retainers
- Veneers
- Dental implants
- Dental crowns or bridges
- Sports or Night Guards
- Dentures
- Materials used – Typically, alginates or polyether vinyl silicone.
- Procedure time – Patients usually spend around 15 minutes in the chair. However, preparing the materials needed to take preliminary impressions can be more time-intensive.
#2 Final impressions
Final impressions are a type of dental impressions used by lab technicians to construct dental restoration devices. Ideally, they represent the most accurate, precise impression of a patient’s mouth, teeth, and overall oral health.
- Primary purpose – To provide a “map” of a patient’s mouth, which is essential for the manufacturing of well-fitting prosthetics like:
- Crowns or bridges
- Dentures
- Retainers
- Materials used – Chiefly elastomeric materials like alginate or polyvinyl siloxane.
- Time of procedure – Approximately 15 minutes, unless the lab reports an error was made. If an error was made, the procedure must be repeated until an accurate impression is achieved.
#3 Bite registration impressions
Bite registration impressions were developed to show how a patient’s upper and lower teeth are positioned in relation to one another. They are a type of dental impressions specifically focused on improving teeth alignment.
- Primary purpose – To assess the alignment of patients’ bites before, during, and/or after a treatment protocol has been carried out. They may also be used to help create:
- Crowns
- Mouth or night guards
- Dentures
- Materials used – Some practitioners use articulating paper to demonstrate bite alignment. Others take 3D impressions, sometimes with polymers like polysiloxane.
- Time of procedure – Minutes, unless the impression needs to be repeated for accuracy.
Subscribe to our newsletter!
We send emails on Tuesdays. Keep an eye out for the next one!
The traditional dental impression process
Since the introduction of traditional dental impressions in the 1800s, the materials used have evolved from crude wax to more advanced materials like alginates. However, over that time, the process for taking traditional dental impressions has remained essentially unchanged:
Step 1 – Patient’s teeth are cleaned and prepped
Step 2 – Impression material is prepped
Step 3 – Impression material is portioned into a tray sized to the patient’s mouth
Step 4 – Tray is placed into the patient’s mouth and pushed against one set of teeth (upper or lower) ensuring proper contact
Step 5 – Wait for the material to sufficiently set
Step 6 – Tray is released cleanly
Step 7 – Steps 3–6 are repeated with the opposing set of teeth
Step 8 – Impressions are inspected, ensuring overall integrity and proper detail
Step 9 – Impressions are labeled, packaged, and shipped to a dental lab
Due to the many variables at play during the process detailed above, traditional modes such as alginate impressions are subject to error and/or defect necessitating the entire process be repeated.
Assuming the impressions meet standards, the process takes around 15 minutes, which may not seem like much, but to patients–especially those with a strong gag reflex–can feel like an uncomfortable eternity.
Even after a proper impression has been taken, the mold itself may be lost or damaged rendering it unusable and forcing you to, once again, repeat the process from scratch, costing you materials and time, not to mention exhausting your patient.
What are digital dental impressions?
Digital dental impressions are 3D, fully-manipulable renderings of a patient’s entire oral cavity using a intraoral scanner. Whereas today’s alginate impressions retain both the processes and risks to which they’ve been historically subject, digital dental impressions are a leap forward into previously unimagined levels of efficiency, convenience, comfort, accuracy, and reliability. This advancement represents a sea-change for practitioners and patients alike.
After a standard cleaning, the entire process takes just three simple steps.
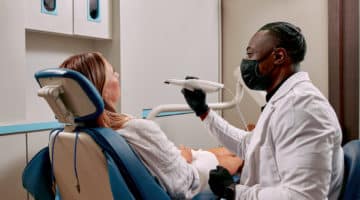
Step 1 – Scanning wand is inserted into a patient’s mouth where it emits thousands of painless light pulses, digitally recording patients’ teeth, gums, and bite in minute detail–all in less than two minutes.
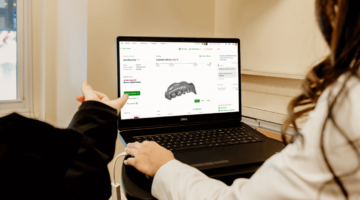
Step 2 – Digital scan information is automatically fed to a nearby computer where, software stitches the raw data into an easy-to-use digital model displayed on a nearby monitor.
Step 3 – The model is ready for inspection or, with just the push of a button, near-instant transmission to a lab for fabrication.
Digital impressions have many, wide-ranging benefits over alginate impressions:
- Faster appointments – As they take a fraction of the time to accomplish compared to their traditional forerunner, digital impressions allow you to quickly get patients into and out of the chair.
- Improved fabrication turnaround – With scan data transmitted electronically directly from your scan to a lab, not only do you completely eliminate the logistics and costs of packaging and shipping impressions, you can be assured that patient data is securely recorded, greatly reducing any risk of damage or loss. Additionally, this digital transfer is just plain faster and more efficient; think email versus snail mail.
- Improved patient experience – Besides taking place nearly 8X faster than alginate dental impressions, as a no-gag alternative, digital impressions are much more comfortable for patients overall.
- Improved model accuracy – The incredible technology behind intraoral scanners makes the resulting models much more accurate than their traditional counterparts. Whereas putty is limited by the quality of its physical spread and contact, digital scanners record surfaces and details using light detecting crevices and details that alginates would simply miss. This leads to significantly fewer restoration redos and adjustments over alginate impressions.
- Simplified expenses – Digital impressions completely eliminate the costs associated with dental trays, putty materials, and mixing bowls not to mention the costs associated with shipping and logistics.
- ‘Wow’ factor – Many dentists report excitement from patients experiencing digital scans! There is the novelty of seeing their mouth rendered so quickly and accurately before their eyes, but more durably, dentists find that patients are excited to track a treatment’s progress over time–being able to appreciably observe results powerfully affects patients’ opinions of their dentists. In addition, many dentists report that adoption of a digital scanner leads to referrals; patients love to post photos of their digital scan to social media and regale friends and family with the benefits of this amazing tech.
Make a glowing impression in care with Dandy
Increasingly, dental offices are following patient preferences and embracing digital impression techniques. Tools like Dandy’s intraoral scanner make introducing this technology seamless, matching the rhythms of your practice and rendering impressions with exacting precision.
It’s our mission to help dental practices modernize and hybridize. When you partner with our digital dental lab, we’ll send you a free intraoral scanner to start casting impeccable impressions immediately.
Whether you’re looking to save costs, simplify workflows, or spare your patients that “Ouch!” moment in the chair, contact us to go digital with Dandy today.
Sources:
ScienceDirect. Impression Material.
https://www.sciencedirect.com/topics/nursing-and-health-professions/impression-material
Journal of the History of Dentistry. The Historical Evolution of Dental Impression Materials. https://pubmed.ncbi.nlm.nih.gov/28777510/
Science Direct. A clinical study comparing digital scanning and conventional impression making for implant-supported prostheses: A crossover clinical trial.
https://www.sciencedirect.com/science/article/abs/pii/S0022391321000287
Science Direct. A clinical study comparing digital scanning and conventional impression making for implant-supported prostheses: A crossover clinical trial.
https://www.sciencedirect.com/science/article/abs/pii/S0022391321000287


