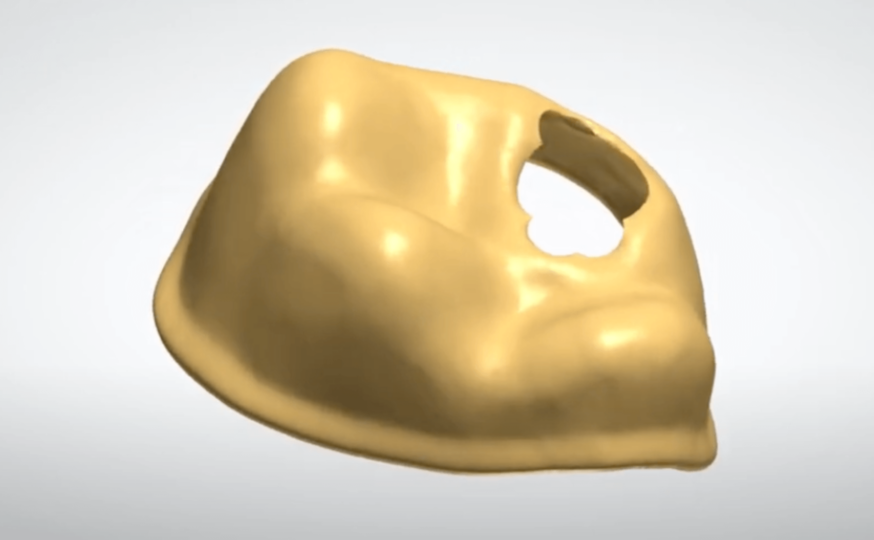
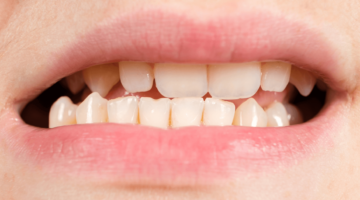
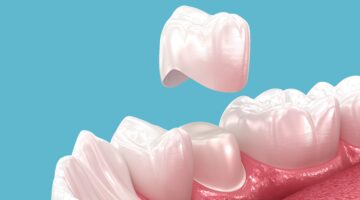
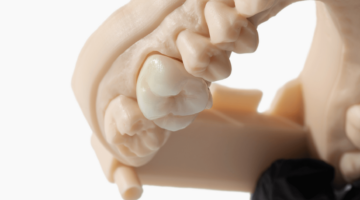
A reduction coping is a temporary, thin shell, typically made of resin or metal, that a dental technician creates to guide the dentist in removing the correct amount of tooth structure when preparing a tooth for a zirconia crown or other restoration.
Reduction copings help to ensure that the final restoration fits properly and has the correct thickness. They can also save time and money by eliminating the need for additional appointments or remakes.
How to use a crown reduction coping
The workflow for using a crown reduction coping involves the following steps:
- The dentist prepares the tooth, but leaves slightly more tooth structure than is necessary for the final restoration.
- An impression of the prepared tooth is taken and sent to the dental lab.
- The dental technician creates a replica of the prepared tooth.
- The technician creates the reduction coping, which fits over the prepared tooth replica on the model.
- The technician modifies the model removing the tooth structure through the opening in the coping, creating the exact space needed for the restoration.
- The coping is sent back to the dentist with the completed restoration.
- The dentist places the coping on the prepared tooth and removes any tooth structure that protrudes through the opening.
- The dentist then cements the restoration onto the prepared tooth.
Reduction copings are a useful tool for dentists, but it’s possible to alleviate the need for them altogether with better crown preparation. Digital dentistry has revolutionized the process of dental restoration through the use of intraoral scanners which capture precise 3D images of the prepared tooth, eliminating the inaccuracies that can occur with physical impressions.
Detailed communication between the dentist and the lab technician can also help alleviate the need for reduction copings. Clear instructions regarding desired margins, crown material, and thickness can help guide accurate lab-fabricated restorations and potentially reduce the need for further tooth reduction.
Best practices for crown preparation
Here are some best practices for zirconia crown preparation, aimed at achieving a successful and lasting outcome while minimizing the need for reduction copings:
Pre-operative evaluation
- Thorough diagnosis and treatment planning: Clearly understand the reason for the crown, the patient’s expectations, and any potential complications.
- Radiographic and clinical assessment: Evaluate tooth structure, root health, and surrounding tissues.
- Discussion with the patient: Explain the procedure, risks, and benefits of different crown materials and preparation techniques.
Preparation technique
- Conservative approach: Remove the minimum amount of tooth structure necessary for crown placement, considering material thickness and strength.
- Clear and defined margins: Achieve smooth, well-defined margins for optimal adaptation of the crown and prevention of future leakage.
- Smooth preparation surface: Avoid unevenness or scratches that could affect crown fit and aesthetics.
- Proper reduction angles and chamfers: Follow material-specific guidelines for shoulder, chamfer, or feather-edge preparations to ensure crown retention and strength.
- Adequate occlusal clearance: Provide enough space between the opposing teeth for a comfortable bite and proper function.
- Minimize gingival manipulation: Handle gum tissue gently to avoid inflammation and potential complications.
- Use of depth-limiting burs: Ensure precise tooth reduction within predetermined limits, reducing the risk of over-preparation.
- Employ magnification loupes: Enhance visualization for improved control and accuracy.
Adjunctive procedures
- Digital dentistry: Utilize intraoral scanners and CAD/CAM technology for precise impressions, virtual crown design, and potentially reduced tooth reduction.
- Rubber dam isolation: Maintain a clean and dry operative field for optimal visibility and control.
- Water cooling and air evacuation: Minimize heat generation and ensure clear visualization during tooth preparation.
Communication and collaboration
- Clear communication with the dental lab technician: Provide detailed instructions regarding margins, crown material, thickness, and any specific requirements.
- Consider using reduction copings: While striving for minimal reduction, reduction copings can still be valuable tools for complex cases or ensuring precise crown fit.
Post-operative care
- Provide temporary crown: Protect the prepared tooth and maintain aesthetics while the permanent crown is being fabricated.
- Educate the patient on proper hygiene: Explain how to care for the new crown and maintain oral health.
- Schedule follow-up appointments: Monitor the crown fit, function, and overall oral health.
Tips to create adequate occlusal reduction
Creating adequate occlusal reduction involves achieving the right balance between preserving healthy tooth structure and ensuring enough space for the restoration. Here are some tips to help you achieve that balance:
Planning and preparation
- Understand desired outcomes: Clearly define the restoration type, material, and aesthetic goals. This helps gauge the minimum reduction needed.
- Preoperative assessment: Analyze radiographs, scans, and the tooth itself to estimate enamel and dentin thickness, pulp chamber location, and existing restorations.
- Utilize depth gauges: Take pre-op measurements of existing occlusal clearance and desired restoration thickness to determine reduction target.
- Mark reduction guidelines: Use temporary markers or depth cuts on the tooth surface to visualize the planned reduction.
Technique and precision
- Start conservative: Begin with minimal reduction and gradually increase as needed. Remember, removing tooth structure is irreversible.
- Use depth-limiting burs: These ensure precise and consistent reduction within predetermined limits, preventing over-preparation.
- Follow material guidelines: Different materials have specific thickness requirements. Familiarize yourself with them for optimal restoration strength and durability.
- Maintain smooth surfaces: Avoid unevenness or scratches that could disrupt crown fit and aesthetics.
- Utilize magnification loupes: Enhanced visualization facilitates controlled and accurate reduction.
Considerations for different areas
- Incisors: Focus on preserving aesthetics. Prioritize enamel reduction and minimize dentin exposure.
- Canines: These require more occlusal clearance due to function. Balance preserving structure with providing enough space for the restoration.
- Premolars and molars: Often require significant reduction due to larger cusps and increased chewing forces. Ensure adequate reduction of material thickness and proper occlusal function.
Additional tools and techniques
- Digital dentistry: Intraoral scanners and CAD/CAM technology provide precise data for virtual crown design and accurate assessment of reduction needs.
- Articulating paper and shims: Use them to visualize occlusal contacts and fine-tune reduction for even pressure distribution.
- Bite registration: Capture dynamic jaw movements to guide crown design and ensure proper occlusion.
Remember, minimizing tooth removal while ensuring functional and aesthetic success is key. With careful planning, precise technique, and the right tools, you can create adequate occlusal reduction for a long-lasting and successful restoration.
Capturing occlusal clearance with digital dentistry
Here are some best practices for taking digital impressions with proper occlusal clearance:
Before you begin:
- Inform the patient about the procedure and ensure they are comfortable and relaxed. Encourage them to avoid clenching or biting during the scan.
- Choose a scanner with adequate resolution and depth of field to capture details of the prepared tooth and surrounding tissues.
- Ensure the scanner is properly calibrated for optimal accuracy.
- Evaluate the preparation margins, smoothness, and overall quality before scanning.
- Measure existing occlusal clearance and mark reference points on the tooth to guide later assessment.
During the scan:
- Cut down on excess light to remove the possibility of glare.
- Dry the teeth and gums to reduce moisture in the mouth.
- Use retraction cords and gently retract the gingival tissue for improved visualization and access during scanning. Retraction with dental lasers is not ideal but acceptable due to the risk of scarring and lack of mechanical traction.
- Employ tongue and cheek retractors to maintain a clear field of view and prevent interference from soft tissues.
- Capture the tooth from various angles, including occlusal, lingual, buccal, and interproximal views. Pay close attention to the preparation margins and interproximal spaces.
- Occlusal clearance assessment: Utilize the depth gauge reference points and software tools to analyze and adjust the virtual model for proper occlusal clearance. This could involve using an articulator and articulating paper to physically verify and fine-tune the occlusal contacts in the digital model.
While digital impressions offer significant advantages, proper technique and attention to detail are crucial for capturing accurate occlusal clearance. Consider seeking training from experienced professionals to ensure optimal outcomes.
By following these best practices, you can confidently capture digital impressions with proper occlusal clearance for successful restorations. Most importantly, clearly communicate the desired occlusal clearance to the dental lab technician along with the digital impression.


