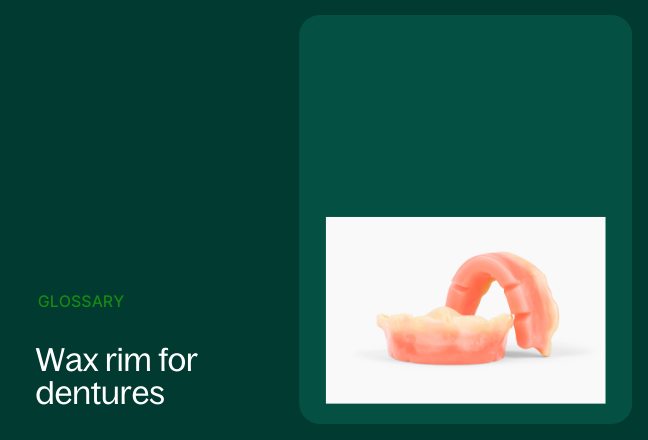
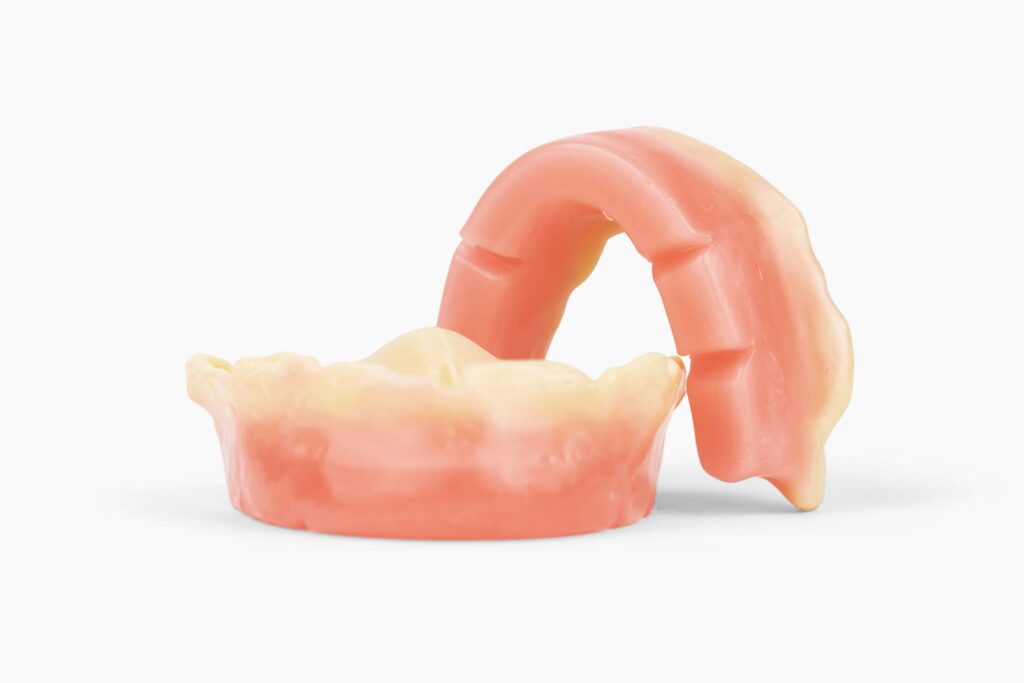
Wax rims are temporary structures used in the process of creating complete and partial dentures. They are not actual dentures, but rather a crucial step in the fabrication process.
What is the purpose of a wax rim?
This denture tool serves three purposes: determining the position and arrangement of artificial teeth, verifying the correct jaw alignment and bite, and delivering an evaluation of the aesthetics of the denture before finalization.
Why are wax rims important?
Wax rims play a crucial role in occlusal correction within the denture fabrication process. They serve as a diagnostic and therapeutic tool, helping dentists achieve optimal bite and jaw function for the patient.
One of the most important roles of wax rims is in providing verification of jaw alignment. Confirmation of the correct vertical dimension of occlusion (VOD) and the relationship between the upper and lower jaws ensures proper biting and chewing function. The wax rim also provides a stable base for the final denture, preventing it from moving around in the mouth.
This allows patients to be involved in the denture creation process. They can provide feedback on the appearance of the denture, including the smile line, lip support, and overall facial aesthetics.
The bite rim workflow
There are two different ways to create wax rims: analog and digital. Let’s take a look at the workflow for both methods.
The analog bite rim workflow
The analog bite rim workflow involves several steps to create and utilize wax rims for accurate denture fabrication. Here’s a detailed breakdown:
- Step 1: Preparation
- Preliminary impressions: Take preliminary impressions of the patient’s upper and lower jaws to create study models.
- Jaw relation records: Depending on the patient’s needs, record jaw relations using methods like face-bow transfer or visual analysis.
- Mounting casts: Mount the upper and lower study casts on an articulator according to the recorded jaw relations.
- Step 2: Base plate fabrication
- Select prefabricated baseplates: Choose appropriate baseplates based on the patient’s jaw size and ridge anatomy.
- Trim and adapt baseplates: Trim the baseplates to fit the patient’s gums and adapt them for proper extension and border molding.
- Heat and adapt baseplates: Heat the baseplates and adapt them to the patient’s gums for a comfortable and accurate fit.
- Step 3: Wax rim construction
- Apply wax to baseplates: Apply a thin layer of softened wax to the baseplates, ensuring even coverage and appropriate thickness.
- Sculpt the wax rims: Sculpt the wax rims to create the desired shape and contour of the gums and lips, considering aesthetics and function.
- Establish vertical dimension: Adjust the vertical dimension of occlusion (VDO) by manipulating the wax rims vertically based on measurements and patient feedback.
- Step 4: Tooth positioning
- Select and arrange teeth: Choose appropriate artificial teeth based on size, shade, and morphology.
- Position teeth on the wax rims: Arrange the teeth on the wax rims in the desired position and angulation, ensuring proper alignment and occlusion.
- Evaluate aesthetics and function: Assess the smile line, lip support, and overall aesthetics—making adjustments to the tooth position and wax rim shape as needed.
- Step 5: Bite registration
- Instruct the patient: Guide the patient to bite together gently but firmly on the wax rims to register the bite.
- Verify bite registration: Check for any occlusal discrepancies or premature contacts and refine the wax rims accordingly.
- Secure the bite registration: Cool the wax rims and secure them in a stable position for transportation to the dental laboratory.
- Step 6: Laboratory processing
- Cast preparation: The dental technician prepares the casts and mounts them on an articulator using the bite registration.
- Denture fabrication: The technician fabricates the final denture base and incorporates the teeth based on the wax rim configuration.
- Finishing and polishing: The technician finishes and polishes the denture after ensuring proper fit, aesthetics, and occlusal function.
- Step 7: Delivery and adjustments
- Denture fitting: Place the final denture in the patient and evaluates the fit, comfort, and aesthetics.
- Occlusal adjustments: Fine-tune the occlusion if necessary to ensure optimal chewing function and patient comfort.
- Patient instructions: Provide the patient with instructions on denture care and maintenance.
The analog bite rim workflow was the best method for years, however, advancements in digital technologies are increasingly offering alternative workflows with potential benefits in terms of accuracy, efficiency, and patient experience. Which brings us to…
The digital bite rim workflow
The digital bite rim workflow is far quicker. Let’s go over the process.
- Take upper and lower intraoral scans
- Select the arch (or arches) that need a full denture to be fabricated.
- If facing difficulty scanning, doctors may take a standard impression and scan either the impression or the model.
- Register bite via wax bite rim and take 360 extraoral scan of wax rim
- After receiving the wax bite rim, guide it into the patient’s mouth to get an accurate bite impression.
- Apply a light amount of body wash to the bite rim for border molding and accuracy.
- Clearly mark the bite rum with the patient’s smile lines, canine lines, and midlines.
- Add blue mousse to register bite.
- It is highly recommended to take photos of the patient:
- Head on with patient smiling naturally with wax bite rim in place
- Two profile pictures (one from each side) with the patient smiling naturally with wax bite rim in place
- A head on photo of the patient with cheek retractors and wax bite rim in place if possible
- Set up case and scan the denture
- Select the arch (or arches) that need a full denture to be fabricated.
- When scanning an arch (or arches) with wax bite rims, select “denture” from pop-up.
- Perform 360 extraoral scan of the wax bite rims
- To obtain bite registration:
- If scanning a single arch, scan with wax bite rim in mouth (from molar to midline) with blue mousse.
- If scanning a dual arch, scan both arches in occlusion outside of the mouth (full arch from molar to molar) with blue mousse.
Using wax rims in denture cases
Whether you’re practicing analog dentistry or leveraging digital dentistry, wax rims are a crucial part of the full denture bite registration process.
